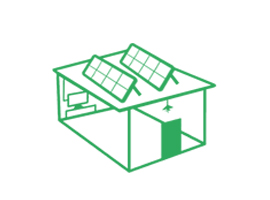
구하는 태양광 패널 장착 브래킷 옳은 것은 화려한 작업은 아니지만, 태양광 프로젝트에서 가장 중요한 부분입니다. 잘못하면 지붕이 고장 나거나, 패널이 흔들리거나, 최악의 경우 누수가 발생할 수 있습니다. 이 가이드는 교외 지붕이든 사업장이든 모든 복잡한 문제를 정확하게 해결하고 명확하고 현실적인 단계별 설치 방법을 제공합니다.
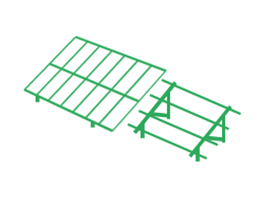
태양광 패널을 나무라고 상상해 보세요. 패널은 잎이고 레일은 가지입니다. 하지만 태양광 패널 장착 브래킷 뿌리가 중요합니다. 뿌리가 약하면 시스템 전체가 무너집니다. 전문가들이 절대 지름길을 택하지 않는 이유는 다음과 같습니다.
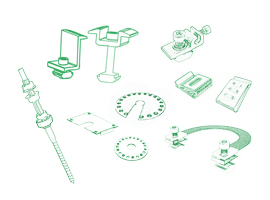
프로 팁 : 기와나 금속 지붕처럼 까다로운 지붕의 경우, "범용" 브래킷은 사용하지 마세요. 특수 키트(예: 코리지 균열과 누수를 방지하려면 타일 후크를 사용하세요.
다음 사항 없이 시작하지 마세요.
비판적인: 서까래가 없으면 강도가 80% 감소합니다. 스터드 파인더로 다시 한번 확인하세요!
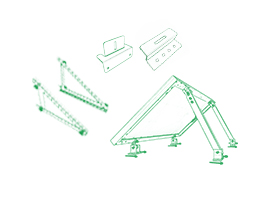
태양광 패널 장착 브래킷 태양광 투자의 숨은 영웅입니다. 여기서 비용 절감은 다음과 같은 위험을 초래합니다.
UL 인증을 받았고 부식 방지 기능이 있는 브라켓을 구입하여 지붕 유형에 맞게 설치하세요. 기와, 슬레이트 또는 금속 지붕의 경우: Corigy와 같은 특수 키트와 같은 엔지니어링 솔루션을 고려해 보세요. 코리지 일반적인 실패의 90%는 방지됩니다.
결론적으로, 정확성 + 고품질 소재 = 25년 동안 문제 없는 에너지를 보장합니다.
설치 완료 태양광 패널 장착 브래킷 볼트와 레일만으로는 충분하지 않습니다. 마음의 평화가 중요합니다. 브래킷을 똑바로 설치하고 방수 처리하며 정확하게 조이면 태양광 설치는 눈보라를 견뎌내고 누수를 방지하며 향후 수년간 깨끗한 에너지를 공급할 수 있습니다. 지름길은 값비싼 수리비, 생명 위협, 에너지 낭비로 이어질 수 있습니다. 기와나 금속 지붕처럼 까다로운 지붕의 경우, 특수 솔루션을 사용하세요. 코리지 바위처럼 튼튼한 방수 기능을 갖추기 위해. 참고: 최고 품질의 브래킷과 전문적인 정밀성만이 태양광 프로젝트를 훌륭하게, 그리고 최고로 만듭니다. 한 번 심으면 영원히 거둘 수 있습니다.
질문: 태양광 패널에 브래킷을 어떻게 부착하나요?
A: 그렇지 않습니다! 브래킷은 지붕 서까래에 볼트로 고정되고, 레일은 브래킷에 스냅으로 고정되며, 패널은 레일에 클램프로 고정됩니다. 브래킷은 시스템을 고정하고, 클램프는 패널을 고정합니다.
질문: 패널당 브라켓은 몇 개입니까?
A: 항상 4개(위쪽 2개, 아래쪽 2개)를 설치해야 합니다. 설치 간격은 해당 지역의 눈/풍속에 따라 달라지며, 보통 1.2~1.8m(4~6피트) 정도입니다. 엔지니어링 사양을 초과하지 마십시오.
질문: 가장 좋은 장착 방법은? A: 지붕에 따라 다릅니다.
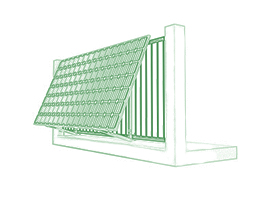
Install solar panel on the metal roof by standing seam, klip-lok, L foot or other clamps.

태양 CORIGY , 11 년 동안의 경험을 연구,제조 및 판매 태양광 장착 시스템입니다. 우리는 항상 노력하고 최고의 제공에 대한 지원을 포함하여,빠른 응답,비용,QC,디자인,대리점을 지원합니다.
메일 주소
sales@corigy.com전화
0086-592-6883200위치
No.893,Haicang Avenue,Haicang District,Xiamen City,China.

 IPv6 지원 네트워크
 한국의
한국의 English
 español